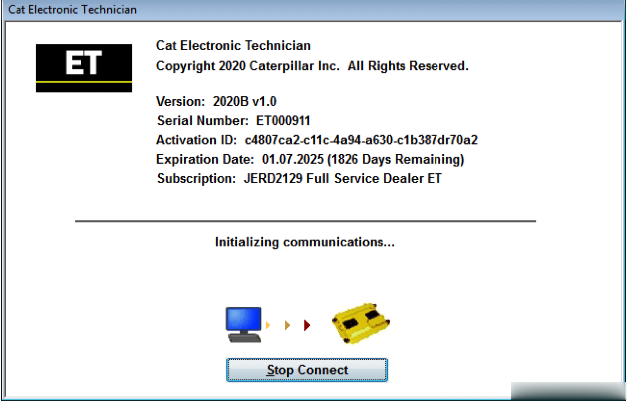
Caterpillar electronic technician 2020B with WinFlash is an updated version of the caterpillar dealer diagnostic software
Microsoft ended extended support for Windows 7 as of January 2020. The CAT ET service tool no longer supports Windows 7 as of the 2020B release. The installation is still possible, but we’re not able to guarantee the stable work of 2020B
In case if you still running windows 7, we can offer you the 2020A version as last compatible with windows 7, for this purpose, please indicate 2020A release in the comments field.
The Built-in Factory Password Generator
The experimental feature allows you to decode (18-Bit passwords not supported) factory passwords
Cat works with the Caterpillar Communication Adapters family.
The recommended adapter is a Caterpillar Communication Adapter III Kit PN 538-5051 (Replaces 466-6258).
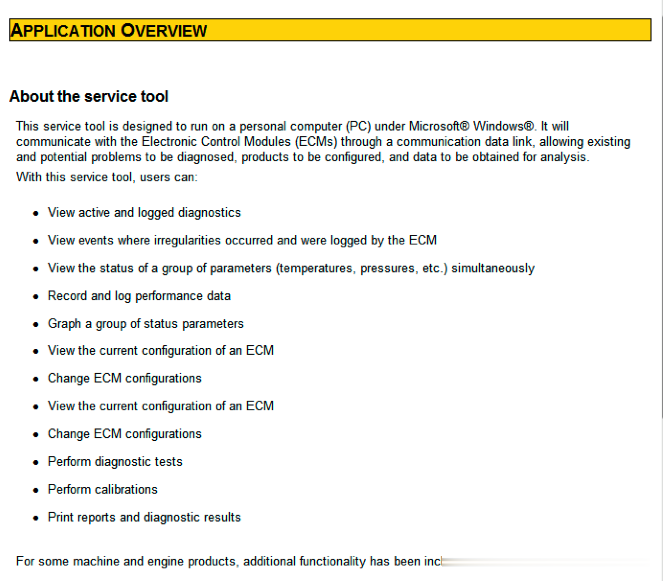
This diagnostic app allows you to: Change vehicle’s parameters Lock / Unlock parameters Diagnose and reconfigure Reading of error codes ECM Flash
Recently, we have received a lot of questions about the most convenient way to obtain this product.
As soon as payment is done you will be redirected to the download page.
The Electronic Technician application can be easily downloaded.
The small file size(~ 500Mb) allows you to get and set up the app within up to 20 minutes even with the slow internet connection or mobile internet.
The activation takes like 5 minutes and you’re ready to go.
Error When Launching Service Tool
There is a Microsoft issue with upgrading libraries during an installation involving certain versions of the C++ redistributable. After a successful service tool installation, when trying to run the service tool for the first time, one of the following errors may occasionally appear: “The entry point could not be located in api-ms-win-crt-runtime” or “The program can’t start because mfc140u.dll is missing from your computer.” If either of these messages is displayed, follow the procedure below. This procedure requires administrator rights.
1. Open the Start Menu
2. Click the Control Panel
3. Click the “Programs and Features” icon. If there is only a “Programs” icon, click the “Uninstall a Program” link next to the icon.
4. Find the program entry for either “Microsoft Visual C++ 2015 Redistributable (x86) – 14.0.24215″ or “Microsoft Visual C++ 2015 Redistributable (x86) – 14.0.242151″
5. If the specified program entry is not found, proceed directly to step 8
6. If the specified program entry is found:
a) Right-click the specified program entry
b) Click the Change menu item
c) Click the Repair button in the dialog that appears
d) Verify that the service tool runs properly
7. If the service tool still displays an error after the Repair operation:
a) Right-click the specified program entry
b) Click the Uninstall menu item
8. Click the link below to download an x86 version of the runtime package from Microsoft.
https://download.microsoft.com/download/6/A/A/6AA4EDFF-645B-48C5-81CC-ED5963AEAD48/vc_redist.x86.exe
9. Install the downloaded package
10. Verify that the service tool runs properly
11. If the service tool still displays an error, please send an email to the support department.
Caterpillar ET Getting Started Guide in PDF Format
What’s New – 2020B
Trainer Update – 299D3
The 299D3 Skid Steer Loader has been added to the Trainer application.
What’s New – 2020A
Product Status Report Updates
The Product Status Report has been updated to include throttle configuration information.
Built-in Factory Password Generator
The experimental feature allows you to decode (18-Bit passwords not supported) factory passwords
What’s New – 2019C
Indication of Selected Communications Adapter
The service tool now displays the selected communications adapter when the service tool is disconnected. The adapter name is displayed in the status area at the bottom right of the service tool window.
End of Support for Windows 7
Microsoft is ending extended support for Windows 7 as of January 2020. The service tool will be ending support for Windows 7 as of the 2020A release.
What’s New – 2019B
Automatic Product Status Report (PSR) Upload
The service tool includes a new tool that automatically uploads Product Status Reports. The tool scans for newly generated Product Status Reports and uploads them when an internet connection is available. The default is that automatic report uploading is enabled. The Preferences dialog has an option to disable the tool.
What’s New – 2019A
ECM Naming Changes
Certain ECMs connect to the service tool over two data links at the same time. The service tool shows a message popup when the ECM is only detected on one link. The service tool has been changed to add the text **INCOMPLETE** in the ECM name when the connection is incomplete. Service tool features that display a connection icon also use a new icon for an incomplete connection.
What’s New – 2018C
No significant new features or feature enhancements
What’s New – 2018B
CEOS Fleet Configuration File TOP
A CEOS (Customer Electronic Option Selection) Fleet Configuration File can be created/modified for an engine using the Service Tool. This is available in connected and disconnected mode.
Error When Launching Service Tool
There is a Microsoft issue with upgrading libraries during an installation involving certain versions of the C++ redistributable. After a successful service tool installation, when trying to run the service tool for the first time, one of the following errors may occasionally appear: “The entry point could not be located in api-ms-win-crt-runtime” or “The program can’t start because mfc140u.dll is missing from your computer.” If either of these messages is displayed, please let us know and we will send you to step by step troubleshooting guide. This procedure requires administrator rights.
Service Tool License Corruption Issues with Windows 10 Updates
Windows 10 updates 1709 and 1803 will corrupt service tool licenses. Future Window 10 updates may do the same
If either of license error messages is displayed, please let us know and we will send you to step by step troubleshooting guide.
What’s New – 2018A
Trainer Update – 988K XE Wheel Loader
The 988K XE Wheel Loader has been added to the Trainer application.
What’s New – 2017C
Preferences Option to Save a Product Status Report to PDF
The Preferences dialog for the Product Status Report has changed. The dialog contains a new checkbox to automatically save a Product Status Report as a PDF file when the report is created. The service tool will continue to automatically save Product Status Reports as an XML file.
What’s New – 2017B
Product Status Report Updates
The Product Status Report has been updated to include certain history features supported by the ECM, such as the after-treatment Regeneration History and the Service Test History.
Winflash Screen Update
The screen for the Winflash feature has been updated. A new Expand All button opens all sections of the screen to show all details for ECMs detected by WinFlash. A new Collapse All button hides all sections of the screen, except for header rows showing detected ECM names.
PC, Communication Hardware, and Cable Requirements
To run the service tool, the next PC, communication hardware, and cable requirements must be met. NOTE: The minimum PC Configurations should not be used as a standard when buying new personal computers for service tool purposes. If the existing equipment meets these minimum requirements, it will run the service tool.
PC Requirements
Recommended Configurations
PC containing a 2.0 GHz dual-core processor
3GB RAM
3GB of the available hard disk drive
DVD-ROM drive (optionally)
15.4-inch XGA Screen (1280×1024 compatible)
Microsoft Windows? 7 Professional or Windows 8 Professional, Windows 10 Professional (Not tested with Home Edition) (Note: Windows 8 RT is not supported)
RS232 port with 16550AF UART or compatible (for use with Comm Adapter II)
USB 1.1 or 2.0 port (for use with Comm Adapter 3)
Ethernet RJ45 connector
Built-in pointing device or mouse
For security purposes, Microsoft Internet Explorer version 11 or newer or Microsoft Edge is recommended.
Note: The most recent version of Microsoft Internet Explorer may not be validated to work with the service tool.
Wi-Fi (for the Wireless Comm Adapter 3)
Minimum Configurations
PC containing a Pentium 2 GHz processor or greater
1GB RAM
500MB of an available hard disk drive
CD-ROM drive
Super VGA monitor or display (1024×768)
Microsoft Windows? 7 Professional or Windows 8 Professional, Windows 10 Professional (Not tested with Home Edition) (Note: Windows 8 RT is not supported)
RS232 port with 16550AF UART or compatible (for use with Comm Adapter II)
USB 1.1 or 2.0 port (for use with Comm Adapter 3)
Ethernet RJ45 connector
Built-in pointing device or mouse
For security purposes, Microsoft Internet Explorer version 9 or newer is recommended. Note: The most recent version of Microsoft? Internet Explorer may not be validated to work with the service tool.
Communication Hardware
Caterpillar Communication Adapter III Kit PN 538-5051 (Replaces 466-6258)
Configuring Cat Electronic Technician to use the Communication Adapter 3
For Cat Electronic Technician to work with the Communication Adapter 3, the settings must be changed to select the Communication Adapter 3 as the Communication Interface Device:
Step 1 Start Cat Electronic Technician.
Step 2 Click the Stop Connect button when it appears.
Step 3 Select the utility menu.
Step 4 Choose “Preferences > Modify…”.
Step 5 Select the Communications tab.
Step 6 Select Cat Comm Adapter 3 (RP1210) and click OK.
NOTE: Because a growing number of products require multiple data link service, the “Enable Dual Datalink Service” checkbox has been pre-selected.
Servicing ECMs on more than one data link requires this checkbox to be enabled.
Failure to do this will result in undetected ECMs and reduced functionality.
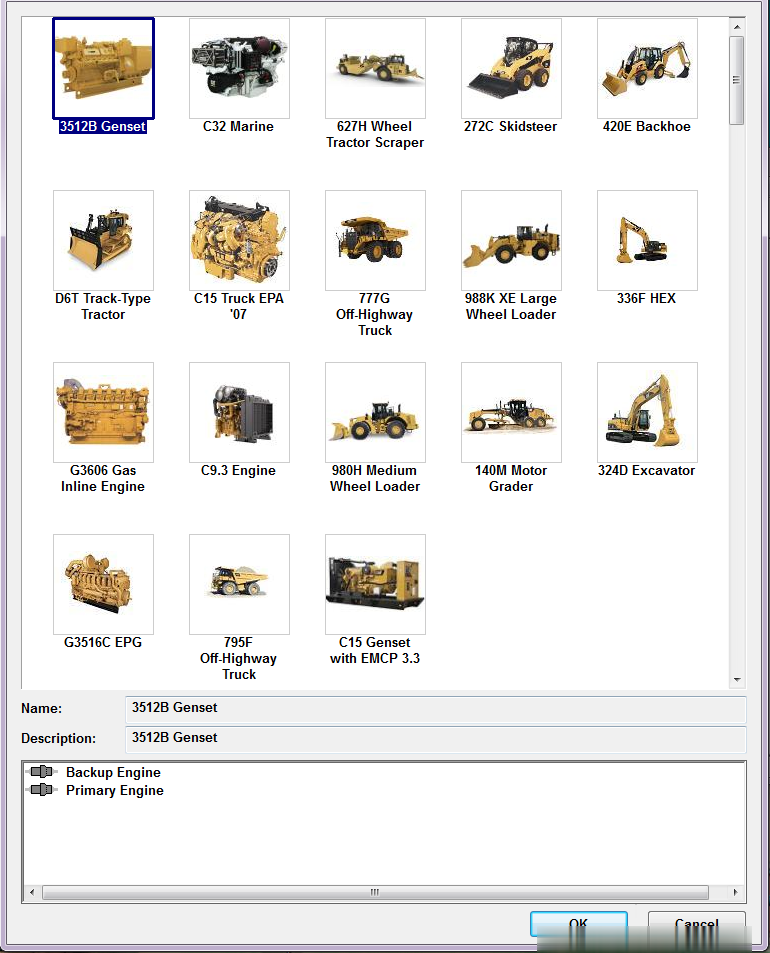
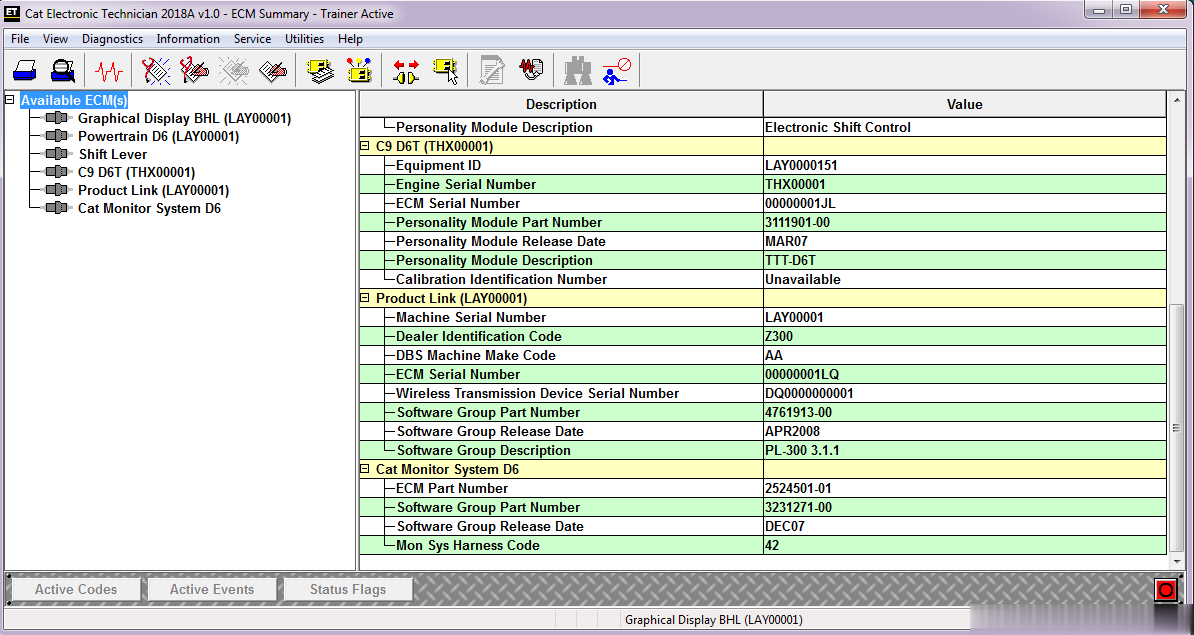
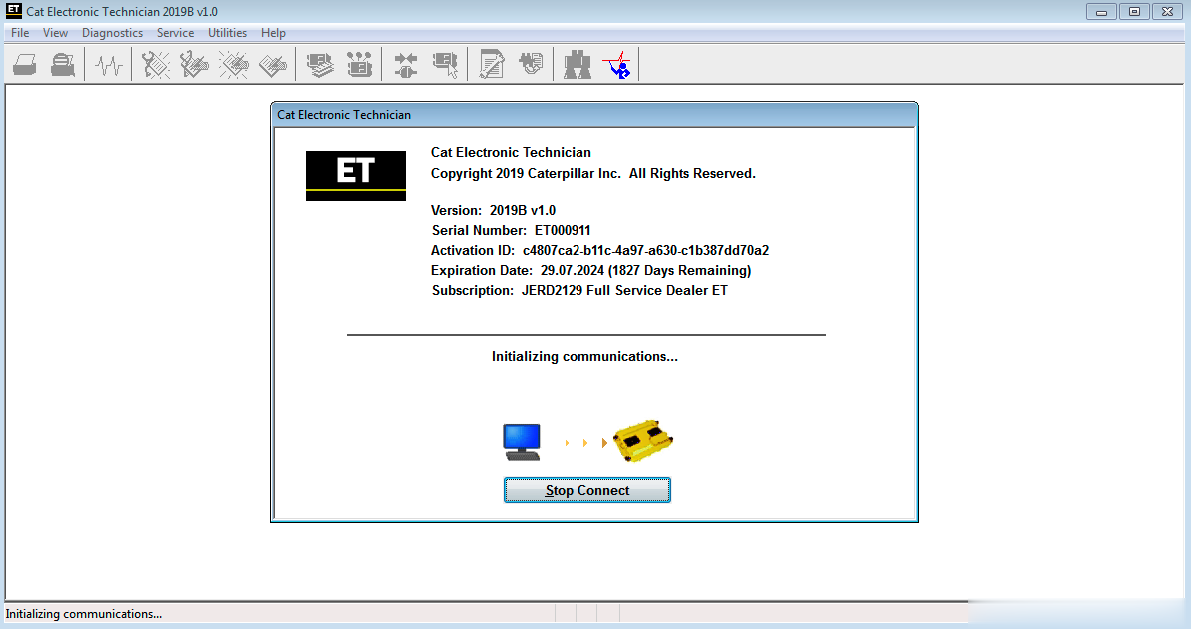
Screenshots for Caterpillar ET 2020B (replaces CAT ET 2019C, 2018A) Electronic Technician Diagnostic Software:

:: برچسبها:
Caterpillar ET ,
:: بازدید از این مطلب : 495
|
امتیاز مطلب : 0
|
تعداد امتیازدهندگان : 0
|
مجموع امتیاز : 0


